Table of Contents
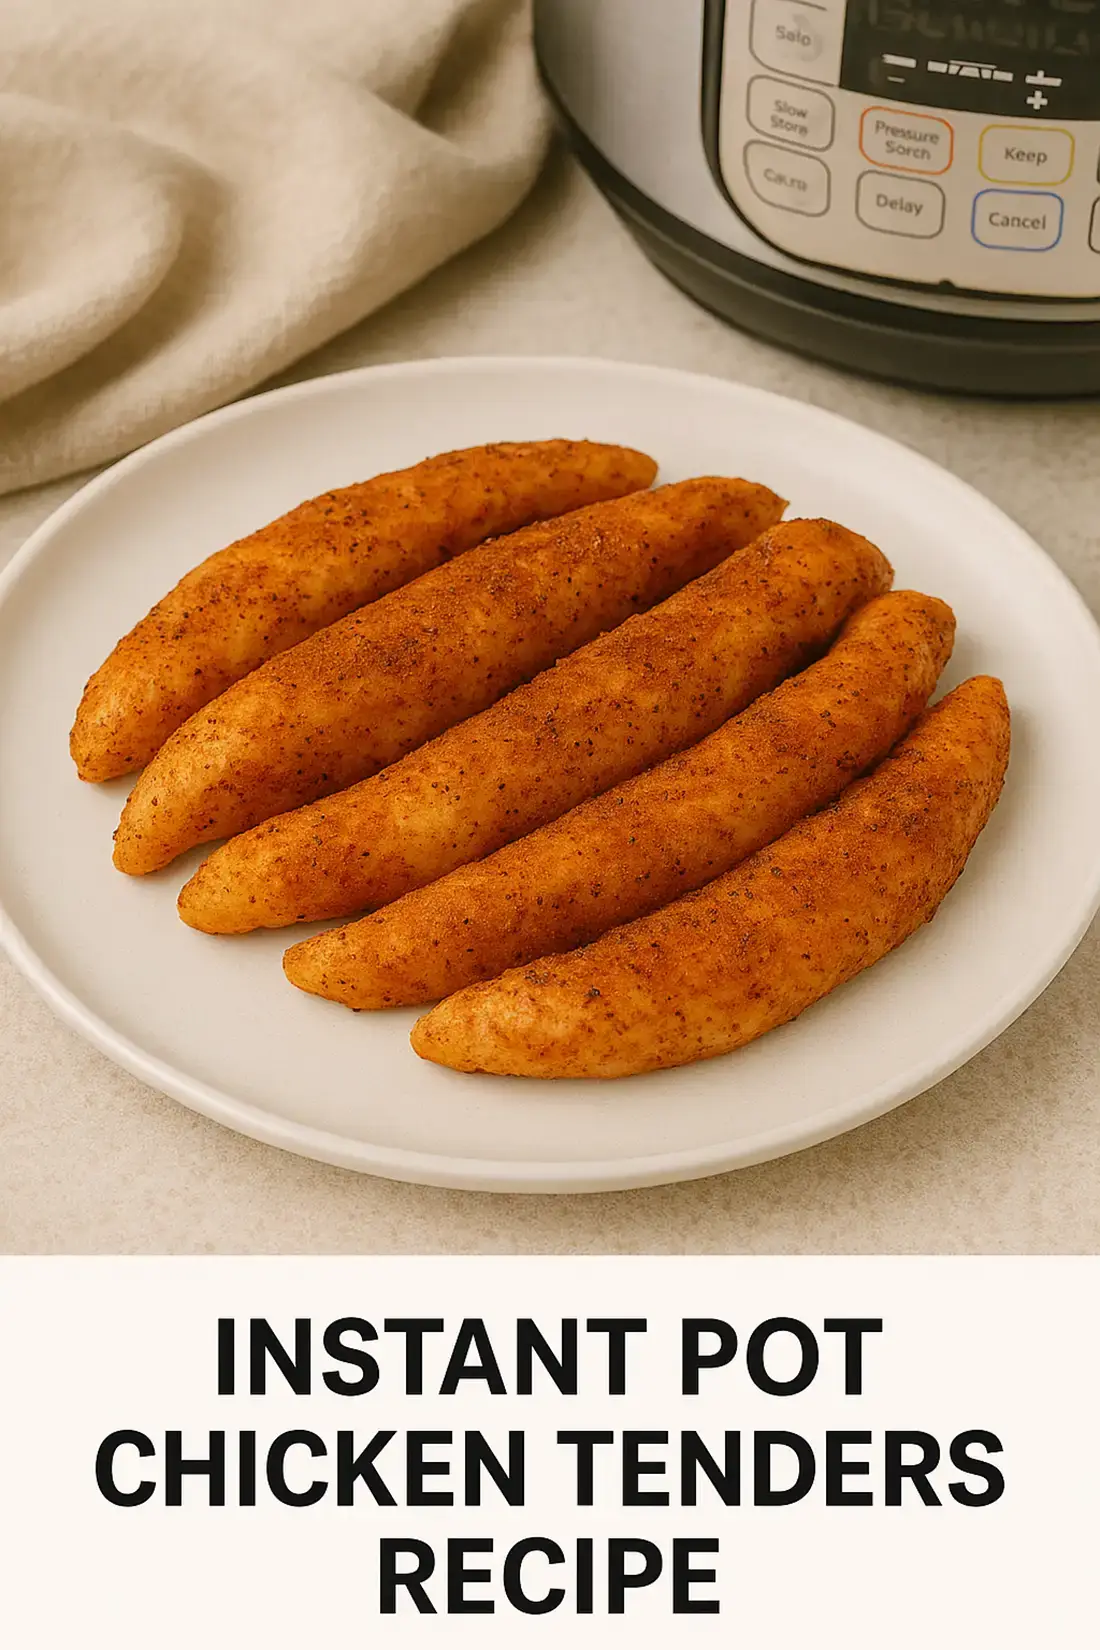
If you’ve ever stood in the kitchen at 6 PM, staring blankly at your fridge, wondering what quick dinner you can throw together that’s both delicious and satisfying — Instant Pot Chicken Tenders might just be your new secret weapon.
Whether you’re feeding picky kids, prepping lunchboxes, or need a lean, protein-rich meal fast, this Instant Pot Chicken Tenders recipe delivers juicy results with minimal effort. The Instant Pot does all the heavy lifting — no need for deep frying or long oven times. Plus, it’s one of the easiest ways to ensure perfectly cooked chicken tenders every time.
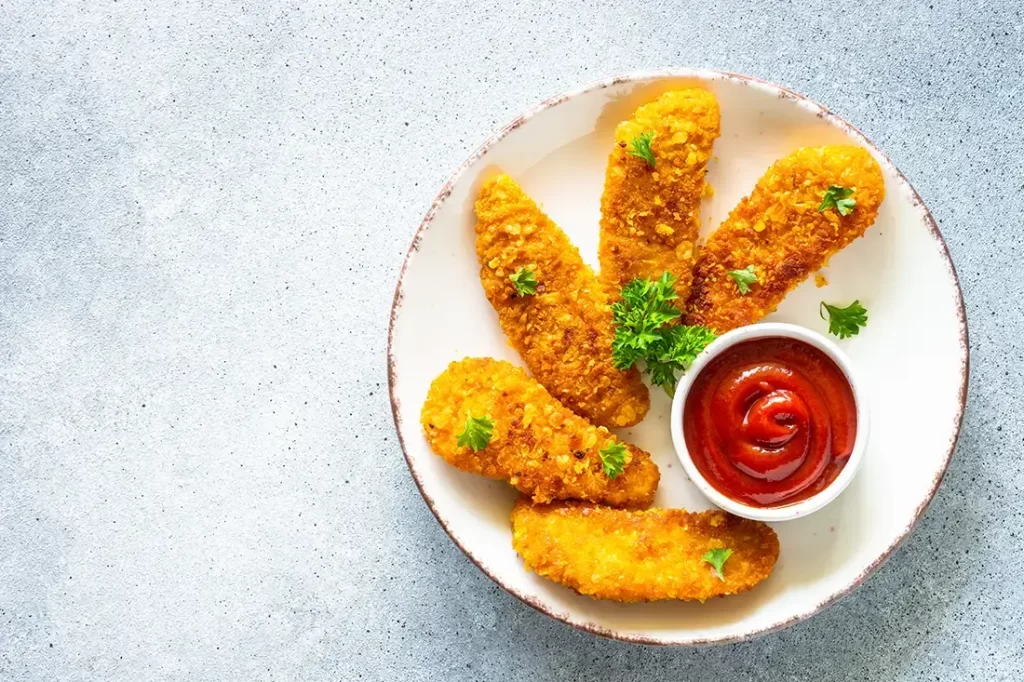
Using the Instant Pot to cook chicken tenders not only locks in moisture but also slashes your cooking time. In under 20 minutes, you’ll have a plate of tender, seasoned chicken ready to serve with veggies, rice, salad, or even in wraps.
Let’s dive into the easiest, most foolproof method to make Instant Pot Chicken Tenders that are flavorful, juicy, and versatile enough for any mealtime.
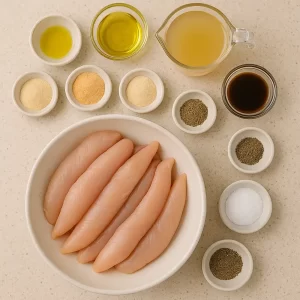
Ingredients
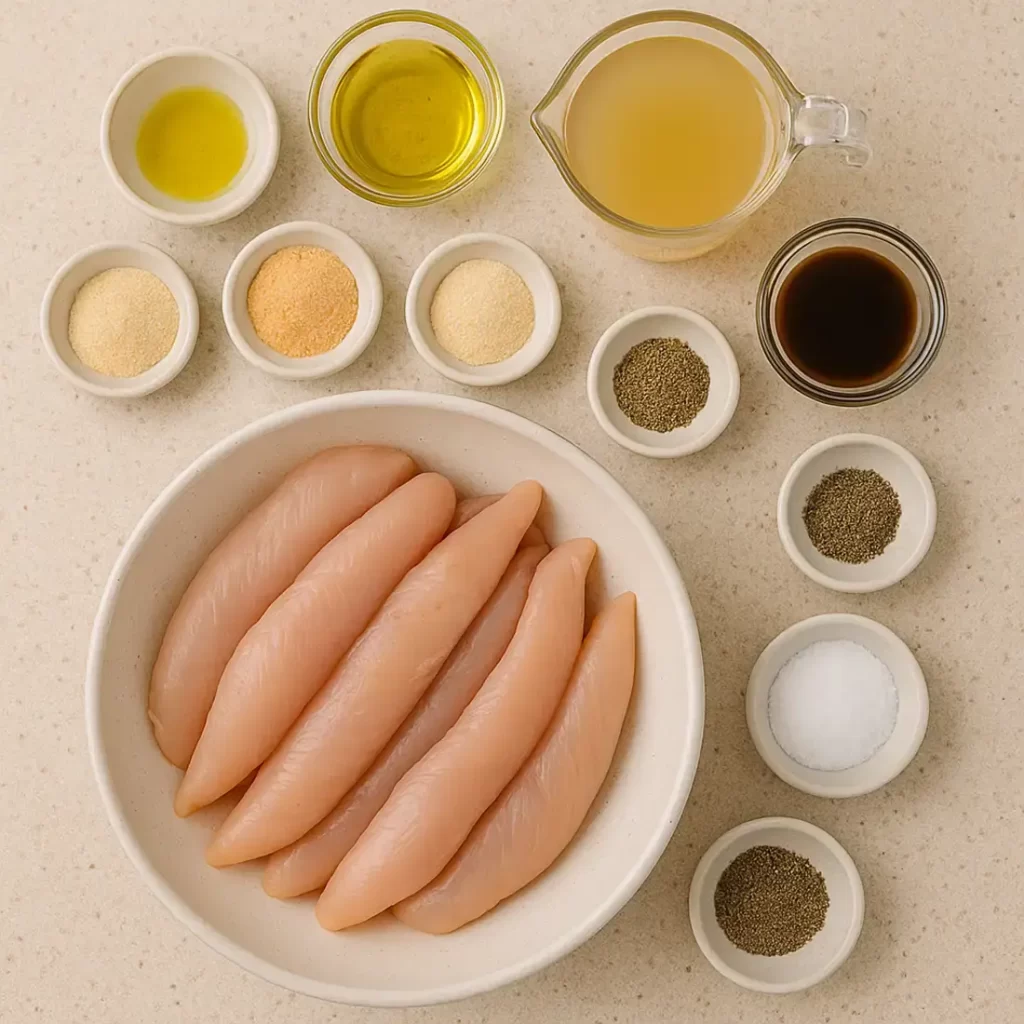
- 1.5 pounds of chicken tenders
These are lean, quick-cooking cuts that are perfect for the Instant Pot. You can also use sliced boneless skinless chicken breasts if tenders are unavailable. - 1 tablespoon olive oil
Helps enhance the flavor of the seasonings and prevents sticking. - 1 teaspoon garlic powder
Infuses the tenders with a mild garlicky aroma and depth. - 1 teaspoon onion powder
Balances out the garlic with a mild, savory sweetness. - 1 teaspoon smoked paprika
Adds a warm, smoky flavor and a beautiful reddish hue. - 1/2 teaspoon dried oregano or Italian seasoning
Gives a herby touch to round out the flavor profile. - 1/2 teaspoon salt (or to taste)
Essential for bringing out the flavors. - 1/4 teaspoon black pepper
Adds mild heat and depth. - 1 cup low-sodium chicken broth or water
Creates the steam needed for pressure cooking and adds flavor if using broth. - Optional: 1 tablespoon soy sauce or Worcestershire sauce
Adds umami richness if you want a bolder flavor profile.
How To Make Instant Pot Chicken Tenders: Step-by-Step Instructions
1. Prepare the Chicken Tenders
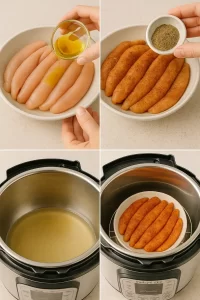
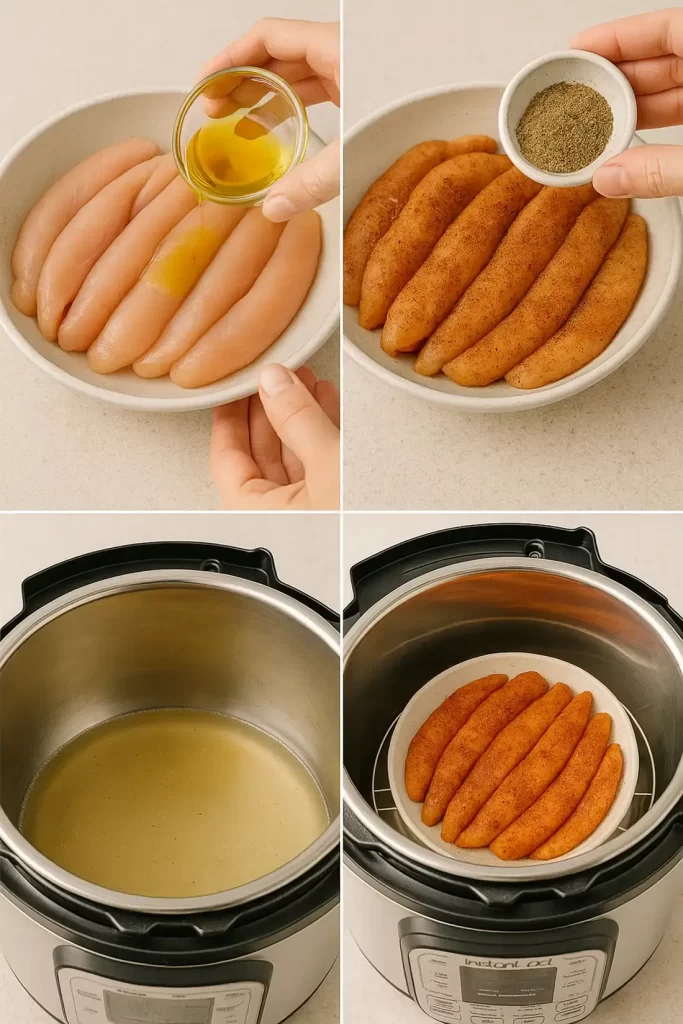
Place the chicken tenders in a large bowl. Pat them dry with paper towels to ensure seasonings stick well. Drizzle with olive oil and toss to coat.
2. Season the Chicken
In a small bowl, combine garlic powder, onion powder, smoked paprika, oregano, salt, and pepper. Sprinkle the seasoning mix over the chicken tenders and rub to coat all sides evenly.
Pro Tip: For even deeper flavor, let the seasoned chicken marinate for 15–30 minutes, or refrigerate for up to 4 hours if you have the time.
3. Add Liquid to the Instant Pot
Pour 1 cup of chicken broth or water into the Instant Pot insert. This liquid is crucial for generating steam and avoiding a burn warning.
Optional: Add soy sauce or Worcestershire sauce to the liquid for a flavor boost.
4. Place Chicken in the Pot
Arrange the chicken tenders in a single layer on the trivet or directly in the liquid, depending on whether you want them slightly steamed (on trivet) or more simmered (in liquid).
5. Pressure Cook
- Close the lid and set the valve to “Sealing.”
- Select Pressure Cook (or Manual) on High Pressure for 4 minutes.
- Once the cooking cycle ends, allow 5 minutes of natural pressure release, then do a quick release to release remaining steam.
Important: Overcooking can dry out the tenders. Stick to the 4-minute cook time and 5-minute natural release for juicy results.
6. Optional Sauté for Color
Want a little browning? After pressure cooking, remove the chicken and use the Sauté mode for 2–3 minutes per side to give them a golden finish.
7. Serve and Enjoy
Let the chicken rest for a few minutes, then slice or serve whole. Use in wraps, on salads, with pasta, or pair with steamed veggies and rice.
Pro Tips for a Perfect Instant Pot Chicken Tenders
- Use Fresh or Thawed Chicken: Avoid frozen chicken unless you adjust the cooking time. Frozen tenders need 6–7 minutes on high pressure.
- Layer of Flavor: Try marinating in buttermilk for 30 minutes before seasoning for extra tenderness.
- Avoid Overcrowding: Don’t pile chicken on top of each other; even layering helps cook evenly.
- Deglaze if Needed: If browning beforehand, deglaze the pot with broth to prevent a burn warning.
Serving Suggestions
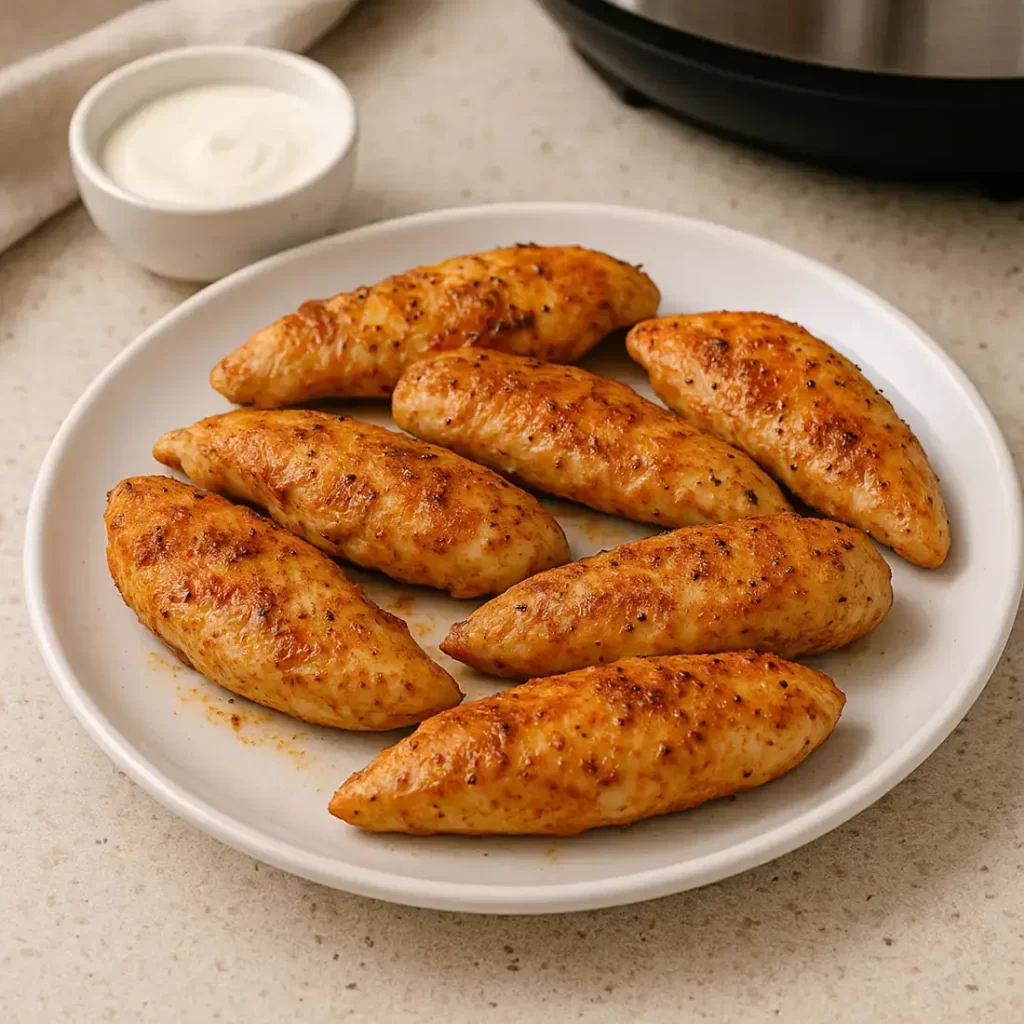
- With Veggies: Serve alongside steamed broccoli, green beans, or roasted carrots.
- Over Grains: Pair with quinoa, brown rice, or mashed potatoes.
- In Wraps: Slice and roll into tortillas with lettuce, tomatoes, and ranch.
- For Meal Prep: Store cooked tenders in meal containers with rice and sautéed veggies for a week of easy lunches.
- Dipping Sauces: Serve with honey mustard, BBQ sauce, buffalo sauce, or garlic aioli for dipping.
Recipe Variations & Customizations
- Spicy Chicken Tenders: Add 1/2 teaspoon cayenne pepper or a few dashes of hot sauce before cooking.
- BBQ Style: Mix a few tablespoons of BBQ sauce into the broth for a sweet-smoky flavor infusion.
- Lemon Herb: Use lemon juice and zest with thyme and parsley for a fresh, zesty twist.
- Crispy Finish: After pressure cooking, coat in seasoned breadcrumbs and bake at 425°F for 10 minutes to crisp up.
- Vegan Option: Use tofu or tempeh slices instead of chicken and reduce cook time to 2 minutes with a quick release.
Recipe Tested & Notes
I tested this Instant Pot Chicken Tenders recipe several times to find the sweet spot between juicy and overcooked. Since chicken tenders are much thinner than chicken breasts, they cook surprisingly fast under pressure. During testing, I found that 4 minutes on High Pressure followed by a 5-minute Natural Pressure Release consistently produced the best texture.
I also tested both fresh and frozen chicken tenders. Fresh tenders had the most tender texture and absorbed the seasoning better, while frozen tenders still turned out delicious with just a couple of extra minutes of cooking time.
For the most flavorful results, I preferred using chicken broth instead of water because it adds a subtle savory depth without requiring extra ingredients.
My Test Results
| Test | Result |
|---|---|
| Fresh chicken tenders | Excellent texture and flavor |
| Frozen chicken tenders | Very good, needed 2-3 extra minutes |
| Chicken broth vs water | Broth produced richer flavor |
| Directly in liquid | Juicier chicken |
| On trivet | Slightly firmer texture but still moist |
| Optional searing after cooking | Better appearance and extra flavor |
Overall, this recipe was very forgiving as long as the chicken wasn’t overcooked.
Mistakes I Made
Even simple Instant Pot recipes can teach you something. Here are a few mistakes I made while testing this recipe so you can avoid them.
Using too little liquid
The Instant Pot needs enough liquid to build pressure. My first test used less than one cup of broth, and the cooker struggled to come to pressure.
Skipping the seasoning
One batch was cooked with only salt and pepper. The chicken stayed juicy, but the flavor was noticeably bland. The garlic powder, onion powder, and smoked paprika make a huge difference.
Releasing pressure immediately
A full quick release caused the juices inside the chicken to escape too quickly, making the tenders slightly less juicy.
Allowing a 5-minute Natural Release gave much better results.
Cooking too long
Chicken tenders are thin. One extra minute under pressure noticeably changed the texture. They became firmer instead of juicy.
Personal Cooking Tips Learned From Testing
After making this recipe multiple times, these are the little tricks that consistently improved the final result.
- Pat the chicken dry before seasoning so the spices stick better.
- Mix all the spices together before adding them to the chicken for even seasoning.
- Don’t overcrowd the pot if making a double batch.
- Use low-sodium chicken broth whenever possible so you can better control the salt level.
- Let the chicken rest for about 5 minutes after cooking before slicing.
- If serving guests, quickly sear the cooked tenders in a hot skillet with a little butter. The golden color makes them much more appealing.
- Save the cooking liquid. It makes an excellent base for chicken gravy or soup.
These small adjustments made a noticeable improvement every time I tested the recipe.
Why I Prefer This Version
I’ve tried baking, pan-frying, air frying, and slow cooking chicken tenders, but I keep coming back to this Instant Pot version.
Here’s why.
It stays juicy
Pressure cooking traps moisture inside the chicken, making it difficult to dry out when cooked correctly.
It’s incredibly fast
From start to finish, dinner can be on the table in less than 20 minutes.
It works for meal prep
The cooked chicken stays moist even after refrigeration, making it ideal for lunches throughout the week.
It’s versatile
These chicken tenders can be served in dozens of ways:
- Salads
- Wraps
- Sandwiches
- Rice bowls
- Pasta dishes
- Tacos
- Meal prep containers
Beginner friendly
Even if you’re new to using an Instant Pot, this recipe is straightforward and reliable.
Storage Notes Based on Actual Testing
I tested storing the cooked chicken in several ways to see how well it held up.
Refrigerator
Store cooled chicken tenders in an airtight container.
They stayed moist and flavorful for up to 4 days.
For the best texture, avoid repeatedly opening the container.
Freezer
Freeze the cooled chicken in freezer-safe bags or airtight containers.
They remained in excellent condition for about 3 months.
I recommend freezing them in meal-sized portions for easy reheating.
Reheating
Microwave
Cover with a damp paper towel and heat in 30-second intervals until warm.
Air Fryer
Heat at 350 degrees Fahrenheit for about 3 to 4 minutes.
This gives the chicken a slightly crisp exterior.
Oven
Bake at 325 degrees Fahrenheit for about 10 minutes covered with foil to prevent drying out.
I found the air fryer gave the best reheated texture.
Equipment Used
You don’t need much equipment for this recipe.
- 6-quart or 8-quart Instant Pot
- Instant Pot trivet (optional)
- Mixing bowl
- Measuring spoons
- Measuring cup
- Tongs
- Meat thermometer
- Small bowl for seasoning
- Paper towels
- Airtight storage containers
Recommended Equipment
A digital instant-read thermometer is one of the best investments for cooking chicken. It ensures the chicken reaches 165 degrees Fahrenheit without overcooking.
FAQs
Can I use frozen chicken tenders in the Instant Pot?
Yes, but increase cooking time to 6–7 minutes and ensure tenders are not stuck together.
Do I need to use a trivet in the Instant Pot?
It’s optional. Cooking directly in broth gives more flavor, while using a trivet results in a steamed texture.
Can I double Instant Pot Chicken Tenders?
Absolutely! Just don’t stack tenders too high and keep the same cooking time.
How to store leftovers?
Store in an airtight container in the refrigerator for up to 4 days or freeze for up to 2 months.
What internal temperature should chicken be?
Use a meat thermometer. Chicken is safe to eat at 165°F (74°C).
Can I stack chicken tenders in the Instant Pot?
Yes. It’s fine if they overlap slightly, but avoid packing them tightly together so the heat can circulate properly.
Can I make this recipe without a trivet?
Absolutely.
Cooking directly in the broth makes the chicken slightly juicier, while using a trivet gives a firmer texture.
Can I shred the chicken after cooking?
Yes.
After resting for a few minutes, the tenders shred easily with two forks and work perfectly for tacos, sandwiches, wraps, or casseroles.
What seasonings work best with chicken tenders?
This recipe is very flexible. Try seasoning combinations like:
- Cajun seasoning
- Lemon pepper
- Ranch seasoning
- Italian herbs
- Taco seasoning
- BBQ rub
- Garlic Parmesan seasoning
Can I use chicken breast instead of chicken tenders?
Yes.
Simply slice large chicken breasts into strips similar in thickness to chicken tenders for nearly identical cooking times.
Why did my chicken turn out dry?
This usually happens because:
- The chicken cooked too long.
- The tenders were extremely thin.
- You performed an immediate quick pressure release.
- The chicken wasn’t allowed to rest before serving.
Can I make gravy from the cooking liquid?
Definitely.
The seasoned broth left in the Instant Pot can be thickened with a cornstarch slurry to create a quick chicken gravy.
Is this recipe good for meal prep?
Yes.
It’s one of my favorite meal prep recipes because the chicken stays moist after refrigeration and pairs well with rice, roasted vegetables, salads, wraps, and pasta.
Can I add vegetables while pressure cooking?
Yes.
Carrots, baby potatoes, and green beans work well, although delicate vegetables like broccoli are better cooked separately to avoid becoming too soft.
Can I double the recipe?
Yes.
The cooking time stays the same. Just make sure you don’t fill the Instant Pot above the maximum fill line and arrange the chicken as evenly as possible.
Substitutes & Ingredient Alternatives
- Chicken tenders → Use sliced boneless skinless chicken breasts or thighs.
- Olive oil → Swap with avocado oil or melted butter for a richer flavor.
- Smoked paprika → Try chipotle powder or regular paprika if you want less smoke.
- Chicken broth → Water + bouillon cube or vegetable broth works just as well.
- Oregano → Substitute with thyme, Italian seasoning, or herbs de Provence.
- Soy sauce → Use coconut aminos for a gluten-free and soy-free alternative.
Nutritional Information (Per Serving – Serves 4)
- Calories: ~210
- Protein: 26g
- Carbohydrates: 2g
- Fat: 11g
- Fiber: 0g
- Sugar: 0g
- Sodium: ~320mg (varies based on broth and added salt)
Final Thoughts
This Instant Pot Chicken Tenders Recipe is the ultimate busy-day lifesaver. It’s quick, juicy, and incredibly flexible — serve it up any way you like, and it’ll never disappoint. Whether you’re feeding a family, prepping for the week, or whipping up a last-minute lunch, this dish checks all the boxes: fast, flavorful, and healthy.
Have you tried this recipe? Did you go with the classic seasoning or spice it up with a variation? Share your version in the comments!
If you loved this recipe, don’t miss our Chicken Spaghetti with Rotel perfect complements to your weekday meal rotation.
Don’t forget to rate and comment below! Your feedback helps others (and us!) improve and try something new.