Table of Contents
If you’re looking for the perfect appetizer that’s equal parts cheesy, savory, and downright addictive, this Sausage Ball Recipe with Bisquick will become your go-to. Whether it’s for a game day spread, holiday party, potluck, or a quick morning bite, these bite-sized snacks never fail to impress.

What makes these sausage balls so special? Well, it’s their simplicity and versatility. With just a handful of ingredients—sausage, cheese, and the iconic Bisquick baking mix – you get flavorful, protein-packed bites with a lightly crisp exterior and fluffy interior. They’re quick to prepare, freeze beautifully, and vanish from the platter in minutes.
In this article, we’ll walk through everything you need to make the best Bisquick sausage balls, share pro tips for perfect texture, and explore delicious variations so you can make them your own.
Ingredients for Sausage Ball Recipe with Bisquick
Here’s everything you’ll need to whip up this irresistible snack:
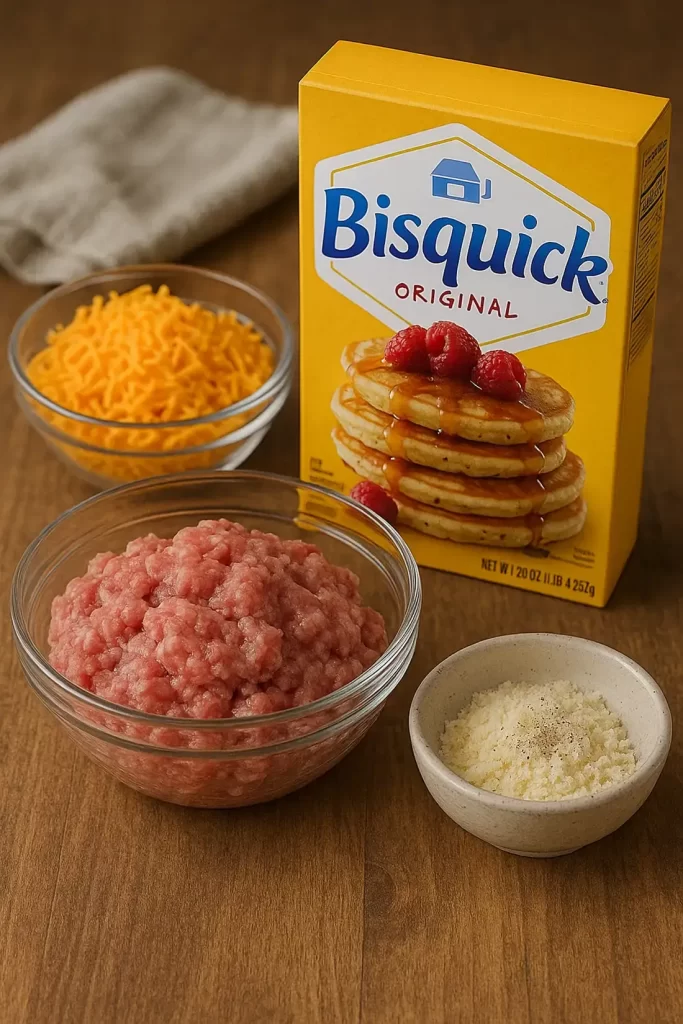
- 2 cups of Bisquick baking mix
This self-rising baking mix is the key to the soft and fluffy texture. It binds everything together and helps the balls puff as they bake. - 1 pound of uncooked ground pork sausage
Choose spicy for heat or mild for a more classic flavor. The fat in the sausage helps keep the balls moist. - 1 ½ cups of shredded sharp cheddar cheese
Sharp cheddar adds bold flavor and melty goodness. You can use freshly shredded cheese for the best melt and consistency. - ¼ cup of milk (optional)
If your dough feels too dry, a splash of milk makes mixing easier and adds a touch of moisture. - 1 teaspoon of onion powder
Enhances the savory depth of the sausage and cheese. - ½ teaspoon of garlic powder
Adds subtle garlicky flavor without overpowering the dish. - Pinch of black pepper
Balances the richness of the sausage and cheese with mild heat.
Substitutions & Suggestions:
- You can swap pork sausage with turkey sausage for a leaner option.
- Prefer a different cheese? Try pepper jack for a spicy twist or Colby for a milder taste.
- Gluten-free Bisquick works as a 1:1 substitute for those with dietary restrictions.
How to Make Sausage Ball Recipe with Bisquick (Step-by-Step Instructions)
Prep Time: 15 minutes
Cook Time: 20-25 minutes
Total Time: ~40 minutes
Servings: Makes about 24 sausage balls
1. Preheat the Oven
Preheat your oven to 350°F (175°C). Line a baking sheet with parchment paper or a silicone baking mat to prevent sticking and make cleanup easy.
2. Combine Ingredients
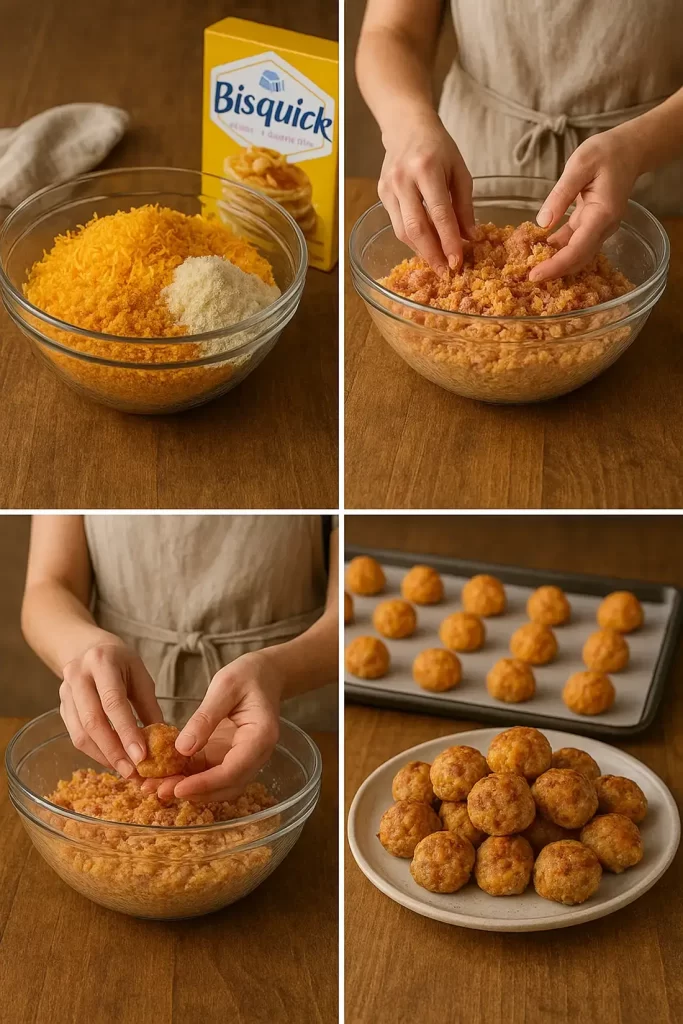
In a large mixing bowl, add the ground sausage, shredded cheese, and Bisquick mix. Sprinkle in the onion powder, garlic powder, and black pepper.
Pro Tip: Use your hands to mix everything thoroughly. It may feel a bit dry at first, but keep mixing until the dough comes together. If it’s too crumbly, add milk one tablespoon at a time until it binds nicely.
3. Shape the Balls
Scoop out about 1 to 1.5 tablespoons of the mixture and roll into balls using your hands. Place them spaced about an inch apart on your prepared baking sheet.
Pro Tip: Use a small cookie scoop for evenly sized balls. This helps them bake uniformly.
4. Bake to Perfection
Bake in the preheated oven for 20–25 minutes, or until the sausage balls are golden brown and cooked through. The cheese will create a crispy crust on the bottom—don’t worry, that’s the best part!
5. Serve Warm
Once baked, let them rest for 2–3 minutes on the tray. Then serve warm with your favorite dipping sauces.
Pro Tips for the Perfect Sausage Ball Recipe with Bisquick
- Shred your own cheese
Pre-shredded cheese is coated with anti-caking agents that can dry out your sausage balls. Grate fresh cheese for better melting and texture. - Don’t overbake
Sausage balls should be golden but not too dark. Overbaking can lead to dry and tough bites. - Chill the mixture (optional)
If the dough is too soft to roll, refrigerate for 15–20 minutes to firm it up. This also helps prevent spreading in the oven. - Use a stand mixer
If you want to save your hands, use a stand mixer with the dough hook. Mix on low until the ingredients are just combined.
Serving Suggestions

These Bisquick sausage balls are versatile and can fit into many occasions. Here’s how you can serve them up:
- As a party appetizer with toothpicks and dipping sauces like honey mustard, spicy ranch, or BBQ.
- As a breakfast bite alongside scrambled eggs and fruit.
- On a brunch board with mini quiches, fresh berries, and croissants.
- Wrapped in crescent rolls for a fancier twist.
Recipe Variations & Customizations
The classic version is always a winner, but here are some fun ways to change things up:
Spicy Sausage Balls

Use hot sausage and add crushed red pepper flakes or a few dashes of hot sauce.
Bacon Cheddar Balls
Mix in cooked crumbled bacon and swap sharp cheddar for smoked gouda or Monterey Jack.
Herb and Garlic
Add chopped fresh parsley, chives, or rosemary for an herby touch.
Air Fryer Sausage Balls
Preheat your air fryer to 350°F and cook the balls in batches for 10–12 minutes, shaking halfway through for even cooking.
Gluten-Free Option
Use gluten-free Bisquick baking mix and double-check that your sausage and cheese are gluten-free.
Dairy-Free Version
Use dairy-free shredded cheese and plant-based milk. You may need a splash more milk to bind the dough.
Recipe Tested & Notes
I tested this Sausage Ball Recipe with Bisquick three different times using different brands of pork sausage and varying amounts of cheese. The first batch used pre-shredded cheddar, while the second and third batches used freshly shredded sharp cheddar.
The version below consistently produced the best results:
- Freshly shredded sharp cheddar melted much better and created a softer interior.
- Mild pork breakfast sausage gave a balanced flavor that everyone enjoyed.
- Allowing the sausage to come to room temperature for about 15 minutes before mixing made the dough much easier to combine.
- Baking at 350 degrees Fahrenheit for about 22 minutes produced perfectly golden sausage balls without drying them out.
The finished sausage balls had a crispy, lightly browned exterior with a soft, cheesy center. They stayed moist even after cooling for 20 to 30 minutes, making them ideal for parties and potlucks.
Mistakes I Made
Testing this recipe taught me a few important lessons.
Using cold sausage straight from the refrigerator
Cold sausage made the mixture very difficult to combine. The Bisquick remained dry in several spots, resulting in uneven texture.
Using pre-shredded cheese
The anti-caking coating on packaged shredded cheese prevented it from melting as smoothly. Freshly grated cheese produced much better results.
Making oversized sausage balls
My first batch was almost twice the recommended size. The outside browned too quickly while the centers needed extra cooking time.
Overbaking
Leaving the sausage balls in the oven for even five extra minutes caused them to become noticeably drier. Removing them as soon as they reached a golden brown color made a huge difference.
Personal Cooking Tips Learned From Testing
After making several batches, these are the tips I now follow every single time.
- Mix everything using clean hands instead of a spoon. It combines the ingredients much more evenly.
- Grate your own cheddar cheese whenever possible.
- Use a small cookie scoop to make perfectly uniform balls that bake evenly.
- Line your baking tray with parchment paper for easier cleanup.
- Rotate the baking sheet halfway through cooking if your oven has hot spots.
- Let the sausage balls rest for about 5 minutes before serving. They become even more flavorful as the cheese settles.
- Always make a double batch because they disappear surprisingly fast.
Why I Prefer This Version
There are dozens of Bisquick sausage ball recipes online, but after testing several variations, this has become my favorite.
Here’s why.
- It uses simple pantry ingredients without unnecessary additions.
- The texture stays moist instead of dry or crumbly.
- The cheese flavor is bold without overpowering the sausage.
- The recipe works equally well for breakfast, holiday appetizers, game day snacks, and meal prep.
- The sausage balls freeze and reheat exceptionally well.
- Beginners can make this recipe successfully on their very first attempt.
Most importantly, every person who tasted this version asked for the recipe, which is always the best sign that a recipe is worth keeping.
Storage Notes Based on Actual Testing
After testing different storage methods, these are the ones that preserved flavor and texture the best.
Refrigerator
Allow the sausage balls to cool completely before transferring them to an airtight container.
They stayed fresh for up to 4 days and reheated beautifully.
Freezer
Freeze the cooked sausage balls on a baking tray until solid, then transfer them to a freezer-safe bag.
They maintained excellent texture for nearly 3 months.
Reheating
For the best texture, reheat in a 350 degree Fahrenheit oven for about 8 to 10 minutes.
An air fryer at 350 degrees Fahrenheit for 4 to 5 minutes also worked extremely well.
While the microwave is convenient, it softens the exterior and removes some of the crispness.
Equipment Used
You don’t need any fancy kitchen gadgets to make this recipe.
- Large mixing bowl
- Measuring cups
- Cheese grater
- Small cookie scoop (recommended)
- Baking sheet
- Parchment paper or silicone baking mat
- Cooling rack
- Oven mitts
Optional but helpful:
- Stand mixer with paddle attachment for effortless mixing
- Instant-read meat thermometer (internal temperature should reach 160 degrees Fahrenheit)
Frequently Asked Questions (FAQs)
Can I make sausage balls ahead of time?
Yes! You can form the balls and refrigerate them for up to 24 hours before baking. You can also freeze unbaked balls for up to 3 months.
Can you freeze cooked sausage balls?
Absolutely. Let them cool completely, then freeze in an airtight container. Reheat in the oven at 350°F for 10 minutes or until heated through.
Why are my sausage balls dry?
Dry sausage balls often result from using too much Bisquick or not enough fat. Try adding a splash of milk or using sausage with a slightly higher fat content.
Can I use pre-cooked sausage?
You can, but the texture will be different. Raw sausage helps the balls hold together better and gives them that classic flavor and moisture.
Can I double the recipe?
Definitely! This recipe scales well, making it perfect for parties or meal prep. Just be sure to bake in batches to avoid overcrowding the pan.
Can I prepare the mixture the night before?
Yes. Prepare and roll the sausage balls, then cover and refrigerate overnight. Bake them fresh the next day.
Why are my sausage balls falling apart?
Usually this happens because the mixture wasn’t combined thoroughly or there wasn’t enough moisture. Mixing longer or adding one to two tablespoons of milk usually fixes the problem.
Can I use hot breakfast sausage?
Absolutely. Hot sausage adds a nice kick without making the recipe overly spicy.
Should I grease the baking pan?
No. Parchment paper or a silicone baking mat works much better and prevents sticking.
Can I make these in the air fryer?
Yes. Cook at 350 degrees Fahrenheit for about 10 to 12 minutes, flipping or shaking halfway through for even browning.
What’s the best cheese for sausage balls?
Sharp cheddar is my favorite because it provides the strongest flavor. Extra sharp cheddar, pepper jack, Monterey Jack, or Colby Jack also work well.
Can I freeze the uncooked sausage balls?
Yes. Freeze them individually on a baking sheet, then transfer them to a freezer bag. Bake directly from frozen, adding about 4 to 6 extra minutes to the cooking time.
Are Bisquick sausage balls served hot or cold?
They’re best served warm, but they’re also delicious at room temperature, making them perfect for holiday buffets and potlucks.
Can I use turkey sausage instead of pork?
Yes. Turkey sausage creates a lighter version with less fat. Since it’s leaner, adding a tablespoon or two of milk helps keep the sausage balls moist.
Substitutes & Ingredient Alternatives
- Bisquick Substitute: Mix 2 cups of all-purpose flour with 1 tablespoon baking powder, ½ teaspoon salt, and 2 tablespoons of shortening or butter.
- Cheese Swap: Use any melty cheese like mozzarella, gouda, or pepper jack.
- Sausage Options: Substitute pork with turkey, chicken, or plant-based sausage for a healthier or vegetarian version.
- Low Carb Tip: Use almond flour and baking powder instead of Bisquick, and reduce cheese slightly to avoid extra moisture.
Nutritional Information (Per Sausage Ball – Approximate)
- Calories: 95
- Carbohydrates: 3g
- Protein: 5g
- Fat: 7g
- Fiber: 0g
- Sugar: 0.5g
- Sodium: 180mg
Nutritional values may vary depending on the sausage and cheese used.
Final Thoughts
There’s a reason why the Sausage Ball Recipe with Bisquick has stood the test of time—it’s easy, delicious, and a guaranteed crowd-pleaser. Whether you’re hosting a party, packing a lunchbox, or simply looking for a quick snack, these little bites hit all the right notes.
Ready to try it out? Make a batch today, and don’t forget to double it—they disappear fast!
Have you made these Sausage Ball Recipe with Bisquick? What twist did you add? Let us know in the comments below!
If you loved this Sausage Ball Recipe with Bisquick , check out our other crowd-pleasers:
Don’t forget to rate this recipe and share it with your friends!