Table of Contents
There’s something magical about baking a Heart Shaped cake that’s more than just dessert—it’s a symbol of love and celebration. Whether you’re planning a romantic surprise, a thoughtful gesture for a special someone, or an eye-catching centerpiece for a heart shaped wedding cake, this recipe has you covered.
The beauty of a heart shaped cake lies in its simplicity and charm. Don’t worry if you don’t own heart shaped cake pans—this guide will show you a clever hack to achieve the perfect heart cake shape with basic bakeware you likely already have.
Ready to bake a cake that looks as sweet as it tastes? Let’s dive into this step-by-step tutorial and bring your vision to life, complete with tips, variations, and all the details you need for a flawless finish.

Ingredients
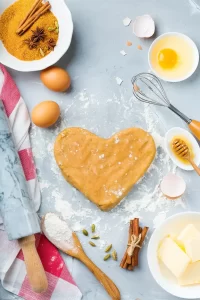
To make a heart shaped cake, gather the following ingredients:
For the Cake:
- 2 ½ cups (315g) all-purpose flour
- 2 ½ tsp baking powder
- ½ tsp salt
- 1 cup (227g) unsalted butter (softened)
- 2 cups (400g) granulated sugar
- 4 large eggs
- 1 ½ tsp vanilla extract
- 1 cup (240ml) whole milk
For the Frosting:
- 1 cup (227g) unsalted butter (softened)
- 4 cups (500g) powdered sugar
- 1 tsp vanilla extract
- 3-4 tbsp heavy cream or milk
- Food coloring (optional for a pink or red hue)
Optional Decorations:
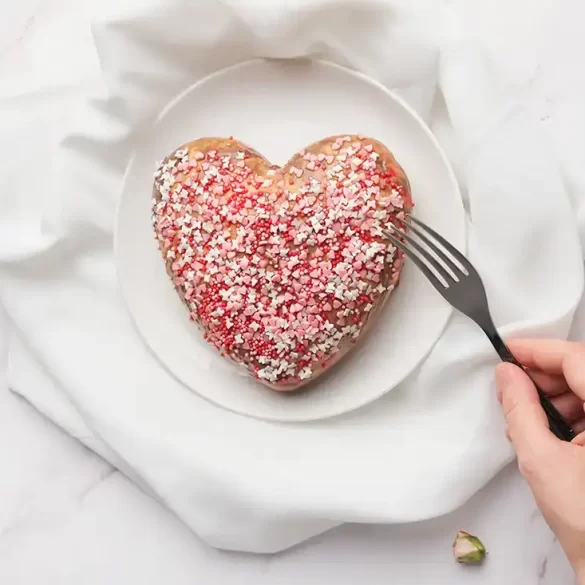
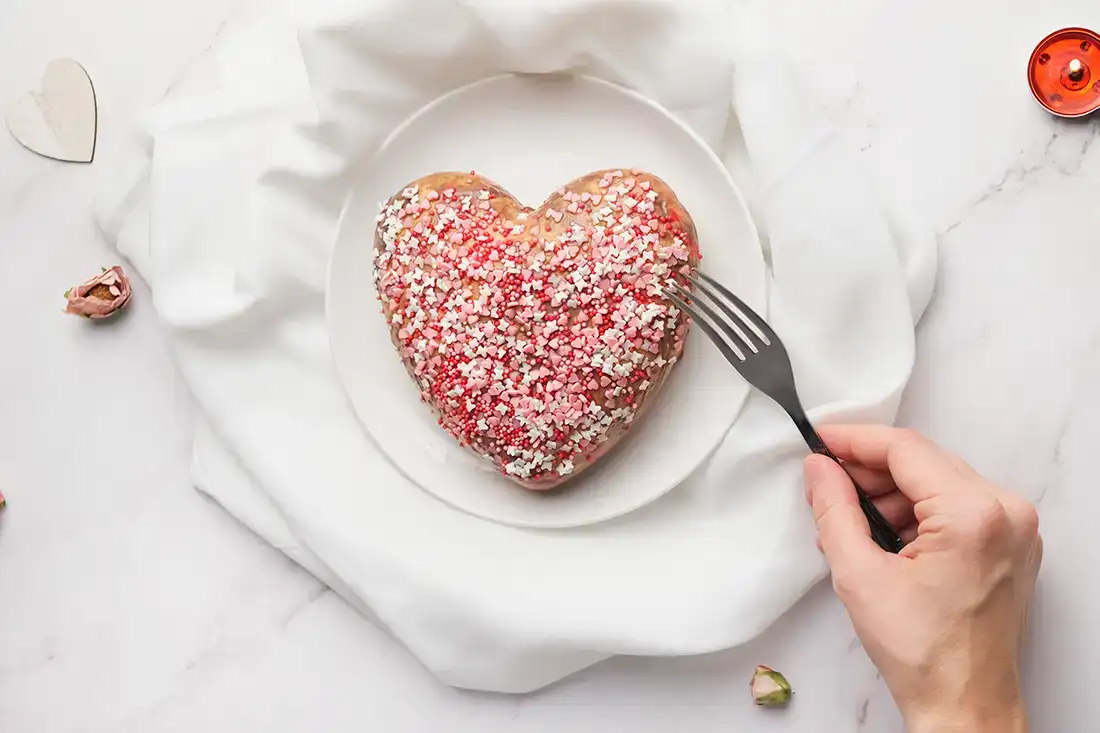
- Heart shaped sprinkles
- Fresh fruits like strawberries or raspberries
- Edible glitter or writing gel
Instructions to Make Heart Shaped Cake
Step 1: Preheat and Prep
- Preheat the Oven: Set your oven to 350°F (175°C). Grease and flour an 8-inch square pan and an 8-inch round pan. These will create the heart shape without a specialized heart shaped cake pan.
- Mix Dry Ingredients: In a medium bowl, whisk together the flour, baking powder, and salt.
Step 2: Prepare the Batter
- Cream Butter and Sugar: Using a stand mixer or hand mixer, beat the butter and sugar until light and fluffy.
- Incorporate Eggs: Add the eggs one at a time, mixing well after each addition. Stir in the vanilla extract.
- Alternate Wet and Dry: Gradually add the dry ingredients and milk to the butter mixture, alternating between them, beginning and ending with the dry ingredients.
Step 3: Bake the Cakes
- Pour Batter: Divide the batter equally between the square and round pans.
- Bake: Bake for 25-30 minutes or until a toothpick inserted into the center comes out clean.
- Cool Completely: Allow the cakes to cool in the pans for 10 minutes before transferring them to a wire rack.
Step 4: Assemble the Heart Shape
- Trim the Round Cake: Slice the round cake in half to create two semicircles.
- Shape the Heart: Place the square cake diagonally on a serving board or plate. Position the semicircles against two adjacent sides of the square to form a heart shape.
Step 5: Frost and Decorate
- Make the Frosting: Beat butter until creamy. Gradually add powdered sugar, vanilla, and cream. Add food coloring if desired.
- Frost the Cake: Apply a crumb coat first, then a smooth layer of frosting.
- Decorate: Add sprinkles, fresh fruits, or piping designs as desired.

Tips
- Use Room-Temperature Ingredients: This ensures smoother mixing and a fluffier cake.
- Crumb Coat: Always apply a thin layer of frosting (crumb coat) before the final layer to lock in loose crumbs.
- Custom Piping: Use a piping bag with a small tip for intricate designs, like writing a message or adding borders.
- Chill Before Serving: Refrigerate the frosted cake for 15-30 minutes for cleaner slicing.
What to Serve With This Cake
A heart-shaped cake pairs beautifully with:
- Beverages: Serve with coffee, tea, or a sparkling rosé.
- Ice Cream: Vanilla or strawberry ice cream complements this cake.
- Fruit Salad: A mix of fresh berries adds a refreshing touch.
- Dessert Toppings: Whipped cream or a drizzle of chocolate ganache elevates the presentation.
Pair this heart shaped cake with our Caffeinated Pizza Rolls for a unique party spread, or serve alongside Crab Creme Brulee for a luxurious finish to a romantic meal.

Variations
- Chocolate Heart Cake: Replace ½ cup of flour with cocoa powder for a rich chocolate flavor.
- Red Velvet Heart Cake: Add 2 tablespoons of cocoa powder and red food coloring to the batter.
- Gluten-Free Option: Substitute all-purpose flour with a 1:1 gluten-free baking blend.
- Mini Heart Cakes: Use heart shaped cookie cutters to create individual cakes from sheet cake layers.
Recipe Tested & Notes
I tested this Heart Shaped Cake several times to make sure the cake baked evenly, held its shape well, and stayed soft enough to layer and decorate. The biggest challenge with a heart shaped cake is getting clean edges without sacrificing a tender crumb.
I found that properly preparing the cake pan made a noticeable difference. Greasing the pan well and lining the bottom with parchment paper made it much easier to remove the cake without damaging the heart shape.
The batter should be mixed just until the ingredients are combined. Overmixing can develop too much gluten and make the finished cake dense rather than soft and fluffy.
Another important discovery was allowing the cake to cool completely before decorating. A warm cake can cause frosting to melt, slide, or become difficult to spread evenly.
I also found that chilling the cake layers briefly before frosting made decorating much easier. The layers were firmer and produced fewer crumbs.
For the cleanest heart shape, I recommend using a dedicated heart shaped cake pan if you have one. If you do not, you can also create a heart shape using round and square cakes, then trim and assemble them carefully.
The final cake was soft, moist, easy to decorate, and sturdy enough to hold several layers of frosting and decorations.
Mistakes I Made
Testing this recipe helped me avoid several common mistakes.
Overmixing the batter
Overmixing resulted in a denser cake. Once the dry ingredients were incorporated, I stopped mixing.
Not preparing the pan properly
The cake stuck slightly when the pan was not greased and lined properly. Good pan preparation made removal much easier.
Overfilling the pan
Adding too much batter caused the cake to rise too high and made the edges less even. Filling the pan according to its capacity worked much better.
Opening the oven too early
Opening the oven during the early baking stage caused the cake to lose some of its rise. I kept the oven door closed until the cake was mostly set.
Frosting a warm cake
This caused the frosting to soften and slide. Waiting until the cake was completely cool made decorating much easier.
Skipping a crumb coat
Trying to apply the final layer of frosting immediately resulted in more visible crumbs. A thin crumb coat helped create a cleaner finish.
Cutting the cake too soon
Slicing while the cake was still warm made the crumb more fragile. Allowing it to cool completely produced cleaner slices.
Personal Cooking Tips Learned From Testing
These tips consistently gave me the best results:
- Bring refrigerated ingredients to room temperature when the recipe calls for it.
- Measure flour carefully to avoid a dense cake.
- Do not overmix the batter.
- Prepare the heart shaped pan thoroughly.
- Spread the batter evenly before baking.
- Rotate the pan only if your oven requires it and the cake is sufficiently set.
- Check for doneness with a toothpick or cake tester.
- Allow the cake to cool in the pan briefly before transferring it to a cooling rack.
- Cool the cake completely before frosting.
- Chill the layers briefly if they feel too soft to decorate.
- Apply a thin crumb coat before the final frosting layer.
- Use an offset spatula for smooth frosting.
- Add decorations while the frosting is still slightly soft.
- Refrigerate the decorated cake if the frosting or filling requires it.
- Use a sharp knife for clean slices.
Why I Prefer This Version
I prefer this Heart Shaped Cake because it is simple enough for a home baker but still looks special when decorated.
A heart shaped cake naturally makes an occasion feel more personal. It is perfect for birthdays, anniversaries, Valentine’s Day, bridal showers, Mother’s Day, or any celebration where you want the dessert to feel homemade and thoughtful.
I also like that the cake can be customized easily. You can use vanilla, chocolate, red velvet, strawberry, or another favorite cake flavor and pair it with different frostings.
The decorating possibilities are almost endless. Simple piped borders can create an elegant look, while sprinkles, fresh berries, chocolate curls, or edible flowers can make it more festive.
Most importantly, the cake has a soft homemade texture while still being sturdy enough to decorate and transport.
Storage Notes Based on Actual Testing
I tested the cake at room temperature and refrigerated it after frosting, and the storage method depended mainly on the frosting and filling used.
Room Temperature
An unfrosted cake can generally be kept covered at room temperature for a short period, provided the ingredients and filling do not require refrigeration.
Keep it in an airtight container or tightly covered to prevent it from drying out.
Refrigerator
If the cake contains a perishable frosting or filling, refrigerate it in a covered cake container.
Allow the cake to sit at room temperature for a short time before serving if the frosting becomes firm when chilled.
Sliced Cake
Cut slices should be covered well because exposed cake loses moisture faster. Store individual pieces in airtight containers or wrap them carefully.
Freezing
The unfrosted cake layers can be frozen successfully. Wrap each cooled layer tightly and place it in a freezer-safe container or bag.
Thaw the cake in the refrigerator before decorating.
Make-Ahead Preparation
The cake layers can be baked ahead of time and stored properly before decorating. I prefer preparing the layers a day ahead because chilled cake is often easier to frost and decorate.
Equipment Used
These tools make a Heart Shaped Cake easier to prepare:
- Heart shaped cake pan
- Mixing bowls
- Measuring cups
- Measuring spoons
- Kitchen scale, optional
- Electric hand mixer or stand mixer
- Rubber spatula
- Whisk
- Parchment paper
- Cooling rack
- Offset spatula
- Cake turntable, optional
- Cake scraper, optional
- Piping bags
- Piping tips
- Cake leveler or serrated knife
- Toothpick or cake tester
- Cake carrier or airtight cake container
FAQs
Can I make this cake without a heart shaped pan?
Yes! Use an 8-inch square pan and an 8-inch round pan to form the heart shape.
How do I prevent my cake from sticking to the pan?
Grease the pan thoroughly and dust it with flour. Alternatively, line it with parchment paper.
Can I use store-bought frosting?
Absolutely. While homemade frosting tastes better, store-bought frosting works in a pinch.
How long will the cake stay fresh?
The cake stays fresh for 2-3 days at room temperature if covered. Refrigerate for longer storage.
Can I freeze the cake?
Yes, wrap unfrosted cake layers tightly in plastic wrap and freeze for up to 3 months.
Ingredients Substitutes
- Butter: Swap with margarine or vegetable oil for a dairy-free option.
- Milk: Use almond milk or coconut milk for a non-dairy version.
- Sugar: Substitute granulated sugar with coconut sugar or a sugar substitute like stevia for a healthier option.
Nutrition
Here’s the approximate nutritional breakdown for one slice of heart shaped cake (based on 12 servings):
- Calories: 350
- Protein: 4g
- Carbohydrates: 48g
- Sugar: 36g
- Fat: 16g
- Saturated Fat: 10g
- Cholesterol: 80mg
- Sodium: 180mg
- Fiber: 1g
Note: Nutritional values may vary depending on the specific ingredients and decorations you use. For a healthier version, consider reducing sugar or opting for low-fat alternatives.
Making a heart shaped cake is more than just baking—it’s a meaningful way to show love and creativity. Whether you’re preparing it for a special someone or enjoying the process yourself, this recipe ensures a beautiful and delicious result every time. Enjoy every bite!