


Table of Contents
Craving something crunchy, salty, and tangy all at once? You’re in the right place! This homemade salt and vinegar chips recipe is everything you love about your favorite snack — but even better, because it’s made from scratch in your own kitchen. Whether you’re obsessed with kettle salt and vinegar chips, looking for a lighter alternative to store-bought brands, or just want to try your hand at a fun DIY snack, this guide has you covered.
We’ll show you how to make salt and vinegar chips that are ultra-crispy, packed with punchy flavor, and incredibly satisfying. Think of it as your go-to snack for movie nights, game day spreads, or just an afternoon craving.
What makes these easy salt and vinegar potato chips stand out? You have complete control over the ingredients, the tangy flavor, and the level of crispiness—all without preservatives or artificial additives. Even better, making homemade kettle-cooked salt and vinegar chips is quick and simple using just a few basic pantry ingredients.
Ready to transform simple potatoes into a crispy, tangy snack you’ll love? Let’s get started!
How to Make Salt and Vinegar Chips

Ingredients
To embark on your journey of creating homemade salt and vinegar chips, gather the following ingredients:
- Potatoes: Russet potatoes are ideal due to their high starch content, which yields a crispier chip.
- Vinegar: Distilled white vinegar is commonly used for its sharp flavor, but apple cider vinegar offers a milder alternative.
- Salt: Fine sea salt ensures even coating and enhances the overall taste.
- Oil: A neutral oil with a high smoke point, such as vegetable, canola, or peanut oil, is essential for frying.

Instructions to Make Salt and Vinegar Chips Recipe
Follow these detailed steps to create your own batch of crispy, tangy salt and vinegar chips:
- Slice the Potatoes: Thoroughly wash and optionally peel the russet potatoes. Using a mandoline slicer, cut the potatoes into thin, uniform slices approximately 1/10 inch (2.5 mm) thick. Uniformity ensures even cooking and crispiness.
- Soak in Vinegar Solution: Place the potato slices in a large bowl and pour enough vinegar to fully submerge them. Soak for at least 30 minutes to infuse the vinegar flavor into the potatoes. For a more pronounced tang, extend the soaking time up to 2 hours.
- Dry the Slices: After soaking, drain the vinegar and pat the potato slices dry with paper towels. Removing excess moisture is crucial to achieve a crispy texture during frying.
- Heat the Oil: In a deep fryer or large, heavy-bottomed pot, heat the oil to 350°F (175°C). Using a thermometer ensures the oil maintains the optimal temperature for frying.
- Fry the Potatoes: Carefully add a small batch of potato slices to the hot oil, ensuring not to overcrowd the pot. Fry until the chips turn golden brown and crispy, approximately 3-5 minutes per batch. Stir occasionally to prevent sticking.
- Season the Chips: Using a slotted spoon, remove the chips from the oil and place them on a paper towel-lined plate to drain excess oil. Immediately sprinkle with fine sea salt while the chips are still hot, ensuring even seasoning.
- Cool and Serve: Allow the chips to cool completely to achieve maximum crunchiness. Once cooled, serve them immediately or store them in an airtight container to maintain freshness.
Tips to Make Perfect Salt and Vinegar Chips Recipe

Achieving the perfect homemade salt and vinegar chips requires attention to detail. Here are some expert tips to ensure your chips are irresistibly crispy and flavorful:
- Uniform Slicing: Utilize a mandoline slicer to achieve consistent thickness, which promotes even frying and prevents some chips from being undercooked or overcooked.
- Proper Soaking: Soaking the potato slices in vinegar not only infuses flavor but also removes excess starch, contributing to a crispier texture. Adjust the soaking time based on your desired level of tanginess.
- Thorough Drying: Ensure the potato slices are thoroughly dried before frying. Excess moisture can lead to oil splatter and soggy chips.
- Oil Temperature Control: Maintain the oil temperature at a steady 350°F (175°C). Fluctuations can result in uneven cooking and oil absorption. Using a kitchen thermometer can help monitor the temperature accurately.
- Batch Frying: Avoid overcrowding the frying vessel. Frying in small batches ensures that the oil temperature remains consistent and allows chips to cook evenly without sticking together.
- Immediate Seasoning: Season the chips immediately after frying while they’re still hot. This allows the salt to adhere better, enhancing the overall flavor.
- Cooling Process: Let the chips cool in a single layer without stacking. This prevents steam from accumulating, which can make the chips soggy.
For an alternative cooking method, consider trying these Air Fryer Salt and Vinegar Potato Chips, which offer a healthier twist without compromising on crunch.
What to Serve with Salt and Vinegar Chips Recipe

Salt and vinegar chips are a versatile snack that pairs well with various dishes and beverages. Here are some serving suggestions to elevate your snacking experience:
- Dips: Complement the tangy flavor of the chips with creamy dips such as ranch, blue cheese, dipping sauce or garlic aioli. The creaminess balances the acidity, creating a harmonious taste.
- Sandwiches: Serve the chips alongside hearty sandwiches like Italian pork sandwiches or classic BLTs. The crunch of the chips adds a delightful texture contrast.
- Burgers: Pair with juicy burgers to enhance the meal’s flavor profile. The acidity of the chips cuts through the richness of the meat, providing a balanced bite.
- Barbecue: Salt and vinegar chips make an excellent side for grilled meats, offering a zesty contrast to smoky flavors.
- Beverages: Enjoy these chips with a cold beer or a refreshing iced tea. The beverage’s coolness complements the chips’ tangy warmth.
Variations of Salt and Vinegar Chips Recipe

While the classic salt and vinegar combination is a favorite, experimenting with variations can lead to exciting new flavors. Here are some ideas to customize your homemade chips:
- Baked Salt and Vinegar Chips – For a healthier alternative, bake the potato slices instead of frying them. Preheat your oven to 400°F (200°C), lay the vinegar-soaked and dried slices on a parchment-lined baking sheet, and brush them lightly with oil. Bake for 15-20 minutes, flipping halfway through, until golden brown and crispy.
- Kettle Cooked Salt and Vinegar Chips – If you love the extra crunch of kettle chips, fry the potatoes in batches at a slightly lower temperature (325°F or 163°C) for a longer duration, around 5-7 minutes per batch. This method gives them a thicker, crunchier texture compared to traditional thin chips.
- Sweet Potato Salt and Vinegar Chips – Swap out regular potatoes for sweet potatoes to add a touch of natural sweetness. The contrast between the tangy vinegar and the sweetness of the potatoes creates a unique flavor experience.
- Spicy Salt and Vinegar Chips – Add a kick to your chips by sprinkling cayenne pepper, chili powder, or red pepper flakes along with the salt. This variation is perfect for those who enjoy a little heat in their snacks.
- Herbed Salt and Vinegar Chips – Enhance the flavor by adding dried herbs such as rosemary, thyme, or dill to your seasoning mix. This variation pairs well with dips like sour cream or tzatziki.
- Apple Cider Vinegar Chips – For a slightly milder acidity and a hint of sweetness, use apple cider vinegar instead of white vinegar. This creates a softer vinegar taste that some may prefer.
Recipe Tested & Notes
I tested this recipe several times using different potatoes, vinegar types, and cooking methods before settling on this version. Russet potatoes consistently produced the crispiest chips because of their high starch content, while Yukon Gold potatoes created a slightly softer texture. I also experimented with soaking times ranging from 15 minutes to 3 hours.
The sweet spot turned out to be a 1-hour vinegar soak followed by thoroughly drying the potato slices before frying. This method produced chips with the perfect balance of crispy texture and tangy vinegar flavor without making them soggy.
I also tested both deep frying and air frying. While the air fryer makes a healthier version, the deep-fried chips had the authentic texture most people expect from Homemade Salt and Vinegar Chips.
Recipe Test Results
- Best potato: Russet potatoes
- Best vinegar: Distilled white vinegar
- Ideal soaking time: 1 hour
- Best frying temperature: 350°F (175°C)
- Best slice thickness: 1.5 to 2 mm
- Yield: Approximately 4 servings
Mistakes I Made
Making Homemade Salt and Vinegar Chips sounds simple, but I learned a few lessons while testing the recipe.
I didn’t dry the potatoes enough
The first batch splattered badly in the oil and came out soft instead of crispy. Drying every slice completely made a huge difference.
I sliced the potatoes too thick
Thicker slices stayed chewy in the center instead of becoming crispy. Using a mandoline solved this problem immediately.
I overcrowded the pan
Adding too many potato slices at once dropped the oil temperature. The chips absorbed excess oil and lost their crunch.
I added salt after the chips cooled
The seasoning didn’t stick well. Sprinkling salt immediately after frying gives much better flavor.
I soaked the potatoes overnight
This actually made the chips too acidic and slightly soft. Around one hour gave the best flavor without affecting the texture.
Personal Cooking Tips Learned From Testing
After making this recipe multiple times, these are the small tricks that consistently gave me the best results.
- Chill the vinegar before soaking the potatoes. Cold vinegar helps keep the potato slices firm.
- Use a mandoline slicer instead of a knife. Uniform slices cook evenly.
- Always fry in small batches for maximum crispiness.
- Keep the oil temperature between 345°F and 355°F throughout cooking.
- Season while the chips are still hot.
- Let the chips cool on a wire rack instead of stacking them on paper towels. This keeps them crisp much longer.
- If you love extra tangy chips, lightly dust them with a homemade vinegar powder after frying.
These small details are what make these Easy Salt and Vinegar Potato Chips taste like premium kettle chips.
Why I Prefer This Version
I’ve tried dozens of Homemade Salt and Vinegar Chips recipes over the years, and this version has become my favorite for several reasons.
First, soaking the potatoes in vinegar instead of simply sprinkling vinegar seasoning creates flavor throughout every bite rather than only on the surface.
Second, the chips stay crisp for days without becoming stale too quickly.
Another reason I love this recipe is that it doesn’t rely on artificial vinegar powders or preservatives. The flavor comes naturally from real vinegar, making the chips taste fresher than many store-bought brands.
Finally, this recipe is incredibly versatile. You can easily turn it into kettle salt and vinegar chips, baked chips, or air fryer chips using the same preparation method.
Storage Notes Based on Actual Testing
After testing different storage methods, here’s what worked best.
- Let the chips cool completely before storing.
- Store them in an airtight glass jar or airtight food container.
- Keep them at room temperature in a cool, dry place.
- Avoid refrigerating them because moisture softens the chips.
- They stay at their crispiest for about 3 days.
- They remain good for up to one week if stored properly.
- If the chips lose some crunch, bake them at 300°F (150°C) for 3-5 minutes to refresh them.
I also tested storing them in zip-top bags. They remained edible but lost some crispiness faster than chips stored in glass containers.
Equipment Used
You don’t need professional kitchen equipment, but these tools make the recipe much easier.
- Mandoline slicer for evenly sliced potatoes
- Large mixing bowl
- Sharp chef’s knife
- Vegetable peeler (optional)
- Paper towels
- Wire cooling rack
- Deep heavy-bottomed pot or Dutch oven
- Kitchen thermometer
- Spider strainer or slotted spoon
- Large baking sheet
- Airtight storage container
Optional equipment
- Air fryer
- Deep fryer
- Salad spinner for drying potato slices faster
FAQ’s While Making Salt and Vinegar Chips Recipe

Can I make salt and vinegar chips without frying?
Yes! You can bake or air-fry them for a healthier alternative. Baking at 400°F (200°C) for 15-20 minutes or air-frying at 375°F (190°C) for 10-12 minutes yields great results.
Why are my chips not crispy?
If your chips are turning out soggy, it could be due to excess moisture. Make sure to pat the potato slices dry before frying or baking. Also, ensure the oil is at the right temperature (350°F or 175°C) and avoid overcrowding the pan.
How can I make the vinegar flavor stronger?
For a stronger vinegar taste, soak the potato slices in vinegar for a longer duration (up to 2 hours) or lightly spray the finished chips with additional vinegar before serving.
Can I use different types of vinegar?
Yes! While white vinegar is traditional, you can experiment with malt vinegar, apple cider vinegar, or balsamic vinegar for a unique twist.
How do I store homemade salt and vinegar chips?
Store them in an airtight container at room temperature for up to a week. To maintain crispiness, keep them in a cool, dry place.
Can I use other vegetables for this recipe?
Absolutely! You can try using zucchini, sweet potatoes, or even kale for a different take on salt and vinegar chips.
Substitutes for Making Salt and Vinegar Chips
If you’re missing an ingredient, here are some suitable substitutes:
- Potatoes → Use sweet potatoes, parsnips, or zucchini for a unique twist.
- White Vinegar → Substitute with apple cider vinegar, malt vinegar, or rice vinegar.
- Vegetable Oil → Use canola, sunflower, or peanut oil.
- Fine Sea Salt → Swap with Himalayan pink salt or kosher salt for a different texture and taste.
If you’re a Fan of chocolate then check out our Chocolate Covered Potato Chips for another crispy delight!
Nutrition of Salt and Vinegar Chips Recipe

Here’s the estimated nutritional breakdown for one serving (about 1 ounce or 28g) of homemade salt and vinegar chips:
- Calories – 150-170 kcal
- Protein – 1-2g
- Carbohydrates – 15-18g
- Fats – 10-12g
- Fiber – 1-2g
- Sodium – 200-300mg
These values may vary depending on the type of potatoes, oil used, and seasoning adjustments. Making your own chips at home allows you to control the ingredients, ensuring a fresher and healthier alternative to store-bought versions.
Final Thoughts
Now that you know how to make salt and vinegar chips at home, it’s time to put your skills to the test. Whether you fry, bake, or air-fry them, these crispy, tangy chips are guaranteed to impress. Plus, with endless variations and pairing options, you’ll never run out of ways to enjoy them.
Happy cooking, and enjoy your homemade salt and vinegar chips!
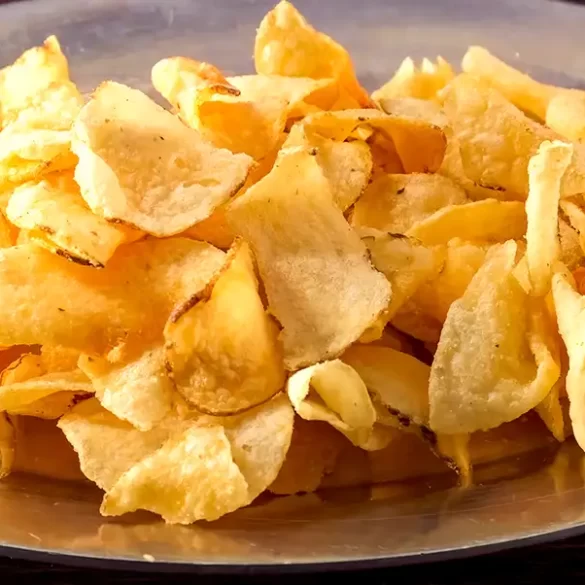


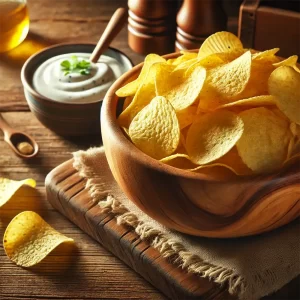 Achieving the perfect homemade salt and vinegar chips requires attention to detail. Here are some expert tips to ensure your chips are irresistibly crispy and flavorful: