

Table of Contents
There’s something incredibly satisfying about making pizza dough from scratch, especially when using active dry yeast. The smell of fresh dough rising, combined with the magic of baking, creates a pizza crust that is light, airy, and crispy all at once. In this post, I’ll walk you through how to make pizza dough with active dry yeast, including ingredients, detailed instructions, tips, and more. Let’s get started on this delicious adventure!
How to Make Pizza Dough with Active Dry Yeast
1. Ingredients
To make the perfect pizza dough with active dry yeast, you’ll need a few simple ingredients that are likely already in your pantry. Here’s the complete list:
- 2 ¼ teaspoons active dry yeast
- 1 ½ cups warm water (110°F to 115°F)
- 3 ½ cups all-purpose flour (plus more for dusting)
- 2 tablespoons olive oil
- 1 teaspoon sugar
- 1 teaspoon salt
Optional:
- A sprinkle of cornmeal for dusting the pizza peel.
2. Instructions
Follow these step-by-step pizza dough with active dry yeast cooking instructions to get the best results every time:
Step 1: Activate the Yeast
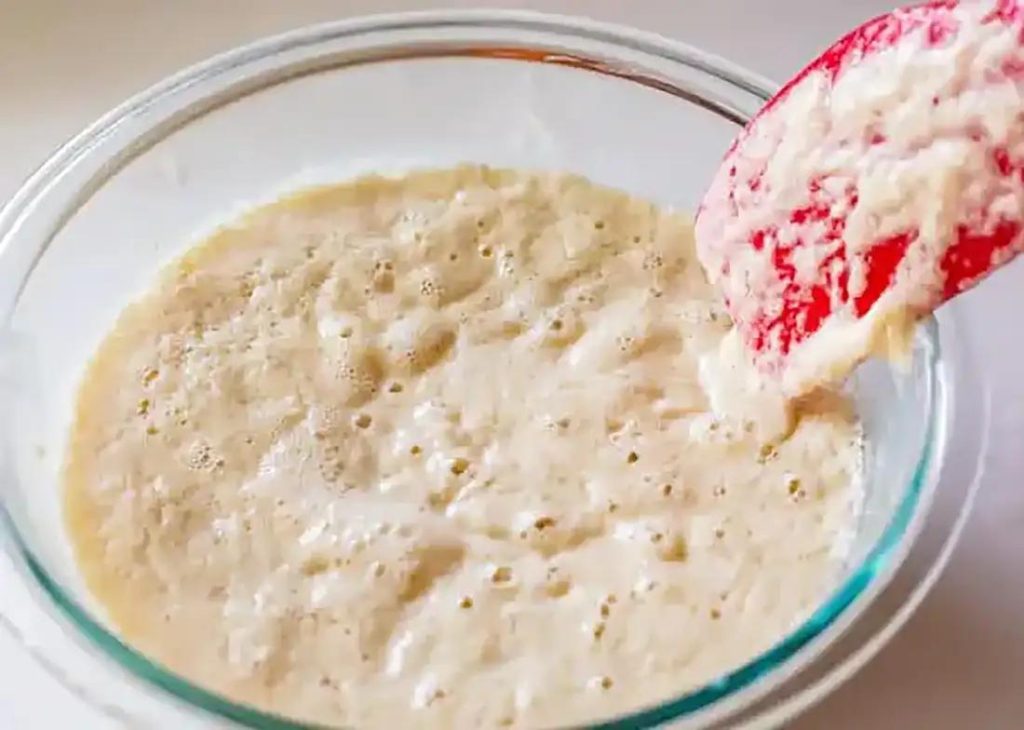
Start by activating the active dry yeast. In a small bowl, combine warm water (between 110°F to 115°F) and sugar. Stir gently to dissolve the sugar, then sprinkle the active dry yeast for pizza dough on top. Let it sit for about 5-10 minutes until the mixture becomes frothy and bubbly. This indicates that the yeast is alive and ready to be mixed into the dough.
Step 2: Mix the Dough
In a large mixing bowl, combine the all-purpose flour and salt. Create a small well in the center and pour in the yeast mixture and olive oil. Use a wooden spoon to mix until the dough starts to come together. At this point, you can begin to knead the dough by hand.
Step 3: Knead the Dough
Turn the dough out onto a lightly floured surface and knead for about 8-10 minutes, until it’s smooth and elastic. If the dough feels too sticky, you can sprinkle a bit more flour as needed. The key here is to achieve a soft but slightly tacky dough that springs back when pressed.
Step 4: First Rise
Once kneaded, form the dough into a ball and place it in a large, lightly oiled bowl. Cover the bowl with a clean kitchen towel or plastic wrap. Let the dough rise in a warm place for about 1 to 1.5 hours, or until it has doubled in size. This is where the magic happens—active dry yeast for pizza dough does its job to create that perfect rise.
Step 5: Punch Down and Shape the Dough
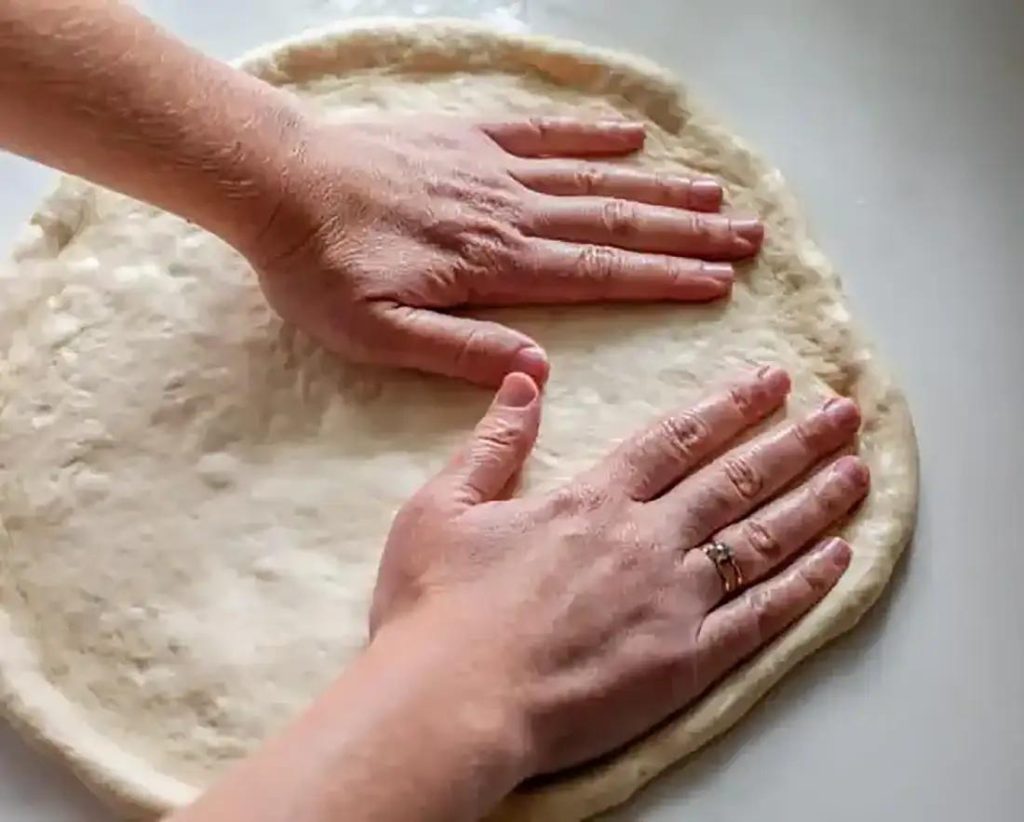
After the first rise, punch down the dough to release any excess air. Turn it out onto a floured surface and divide it in half (or quarters if making smaller pizzas). Let the dough rest for 5 minutes. Then, roll or stretch each portion into a round pizza shape, about 12 inches in diameter for a standard size pizza.
Step 6: Preheat Your Oven
Before baking, preheat your oven to 500°F (or as high as it will go) for at least 30 minutes. If you’re using a pizza stone, place it in the oven during this preheating process to get it nice and hot.
Step 7: Add Toppings and Bake
Transfer your pizza dough to a pizza peel dusted with flour or cornmeal. Add your desired toppings—whether it’s classic margherita, pepperoni, or veggie-packed—and carefully slide the pizza onto the hot stone or baking sheet. Bake for about 10-15 minutes until the crust is golden brown and crispy.
Step 8: Serve and Enjoy
Remove the pizza from the oven, slice, and serve! You’ve just made delicious homemade pizza using active dry yeast.
3. Tips for Perfect Pizza Dough Recipe
Now that you’ve mastered the basic steps, here are some expert tips to make sure your recipe for pizza dough with active dry yeast turns out perfectly every time:
- Use the Right Water Temperature: If your water is too hot, it will kill the yeast. Always aim for the water to be between 110°F and 115°F.
- Give It Time to Rise: Don’t rush the dough. Allowing it to rise fully will give your pizza crust that airy, bubbly texture.
- Don’t Overwork the Dough: Knead just enough to develop gluten, but not too much, as it can make the dough tough.
- Let the Dough Rest: After dividing the dough, let it rest for a few minutes to make it easier to stretch without tearing.
- High Heat for a Crispy Crust: The hotter your oven, the better! A pizza stone or a preheated baking sheet will help achieve that restaurant-quality crisp.
Recipe Tested & Notes
I tested this Pizza Dough Recipe with Active Dry Yeast several times to get a dough that was easy to work with, stretchy without being difficult to handle, and capable of producing a crisp edge with a soft, chewy center. Active dry yeast is especially convenient for home bakers because it is easy to find and gives the dough reliable fermentation when handled correctly.
One of the most important things I learned during testing was that water temperature matters. Water that is too hot can damage the yeast, while very cold water slows fermentation considerably. Lukewarm water worked best for activating the active dry yeast without stressing it.
I also found that flour should not be added all at once. Holding back a small amount made it easier to adjust the dough based on humidity, flour type, and how much water the flour absorbed.
The dough should feel slightly tacky after kneading, but it should not be wet and impossible to handle. Adding too much flour can make pizza dough dense and difficult to stretch, so I preferred using lightly floured hands and surfaces rather than continually adding flour.
Kneading was another important part of the testing process. The dough became smoother, more elastic, and easier to stretch after enough kneading. However, excessive kneading was unnecessary for this recipe.
I also tested different resting times. A short rise works well when you need pizza quickly, but allowing the dough more time to ferment develops better flavor and texture.
For the best homemade pizza, I prefer a hot oven and a preheated baking surface. The intense heat helps the crust puff quickly while keeping the center tender.
One thing that made a noticeable difference was allowing the dough to relax before stretching. Dough that has just been kneaded or taken from the refrigerator can resist stretching. A short rest makes it much easier to shape without tearing.
Mistakes I Made
Using water that was too hot
My first attempt used water that was hotter than necessary. This can damage yeast and lead to poor fermentation.
Adding too much flour
It is tempting to keep adding flour when dough feels sticky. However, too much flour can create a stiff and heavy crust.
Not giving the dough enough time to rise
A rushed dough can still produce pizza, but it lacks the flavor and airy texture of properly fermented dough.
Stretching the dough immediately
Freshly kneaded dough was difficult to stretch because the gluten was tight. Resting it allowed the dough to relax.
Using a cold baking surface
Putting pizza onto a cold tray resulted in a less crisp bottom. Preheating the baking surface produced noticeably better results.
Making the center too thick
A thick center can remain doughy while the edges are already browned. Stretching the dough evenly helped prevent this.
Adding too many toppings
Heavy toppings can weigh down the crust and release moisture during baking. A moderate amount gave me a crispier and better-balanced pizza.
Not preheating the oven long enough
A fully heated oven is essential for good homemade pizza. Giving the oven and baking surface enough time to heat made a major difference.
Using too much bench flour
Excess flour on the bottom of the dough can burn during baking and create a bitter taste. I found that using only enough flour to prevent sticking worked best.
Personal Cooking Tips Learned From Testing
These are the tips that gave me the best results:
- Use fresh active dry yeast.
- Check the yeast before making a large batch if it has been stored for a long time.
- Use lukewarm water rather than very hot water.
- Measure flour accurately.
- Add most of the flour first and adjust the final amount gradually.
- Avoid making the dough unnecessarily dry.
- Knead until the dough becomes smooth and elastic.
- Give the dough enough time to rise.
- Keep the dough covered while it rests.
- Allow refrigerated dough to come closer to room temperature before shaping.
- Let the dough relax if it keeps shrinking while you stretch it.
- Preheat the oven thoroughly.
- Preheat a pizza stone or steel if using one.
- Avoid overloading the pizza with toppings.
- Use a light layer of sauce.
- Bake at the highest suitable temperature your oven allows.
- Transfer the pizza quickly onto the hot baking surface.
- Let the finished pizza rest briefly before slicing.
My Best Pizza Dough Tip
Do not judge the dough only by how it looks immediately after mixing. Fermentation is what gives pizza dough much of its flavor and texture. If you have time, a slower rise in the refrigerator can produce a more flavorful crust than a rushed rise at room temperature.
For a Crispier Crust
Use a very hot oven and a preheated pizza stone or steel. Stretch the dough fairly thin in the center while leaving a slightly thicker edge for a puffy crust.
For a Softer Crust
Avoid adding too much flour during kneading and do not stretch the dough excessively thin. A slightly thicker crust retains more moisture after baking.
Storage Notes Based on Actual Testing
Pizza dough is convenient to prepare ahead, and refrigerated fermentation can actually improve its flavor.
Refrigerator Storage
After the dough has been kneaded, place it in a lightly oiled airtight container or covered bowl.
Refrigerate the dough until you are ready to use it.
Cold fermentation slows yeast activity and allows the dough to develop more flavor.
Before baking, remove the dough from the refrigerator and allow it to rest until it becomes easier to stretch.
Freezing Pizza Dough
Pizza dough can be frozen.
For convenience, divide the dough into individual pizza portions before freezing.
Lightly oil each dough ball and place it into a freezer-safe airtight container or bag.
This makes it easy to thaw only the amount you need.
How to Thaw Frozen Pizza Dough
Transfer frozen dough to the refrigerator and allow it to thaw gradually.
Once thawed, let it sit at room temperature until it becomes soft and relaxed enough to stretch.
Avoid trying to stretch dough while it is still very cold.
Can You Freeze Pizza Dough After It Rises?
Yes. Portion the dough into individual balls before freezing whenever possible. This makes later use much easier.
How Long Can Pizza Dough Be Refrigerated?
The exact storage time depends on the yeast quantity, hydration, flour, and fermentation method. For best quality, use refrigerated dough within the recommended period for your specific recipe rather than keeping it indefinitely.
Storage Tip
If you regularly make homemade pizza, prepare several dough balls at once and refrigerate or freeze them individually. This turns homemade pizza into a much faster weeknight meal.
Equipment Used
These are the tools I found most useful for making pizza dough with active dry yeast:
- Large mixing bowl
- Measuring cups
- Measuring spoons
- Digital kitchen scale
- Wooden spoon or dough whisk
- Bench scraper
- Clean work surface
- Kitchen towel or plastic wrap
- Airtight dough container
- Rolling pin, optional
- Pizza stone or pizza steel, optional
- Pizza peel, optional
- Baking sheet, optional
- Oven thermometer, optional
Equipment Tip
A digital kitchen scale is one of the most useful tools for making pizza dough. Measuring flour by weight gives much more consistent results than using cups because flour can become compressed or loosely packed.
A pizza stone or steel is also worth considering if you make pizza regularly. It stores heat and helps the bottom of the crust cook quickly.
5. FAQs
How long does pizza dough with active dry yeast take to rise?
Typically, it takes about 1 to 1.5 hours for the dough to rise, depending on the room temperature. The dough should double in size before it’s ready to be shaped.
Can I freeze pizza dough made with active dry yeast?
Yes, you can! After the first rise, punch down the dough and divide it into portions. Wrap each portion tightly in plastic wrap and freeze for up to 3 months. When ready to use, thaw the dough in the refrigerator overnight and allow it to come to room temperature before shaping.
What’s the difference between active dry yeast and instant yeast?
Active dry yeast needs to be dissolved in warm water before use, while instant yeast can be mixed directly into the dry ingredients. Both work well for pizza dough, but active dry yeast gives a slightly longer fermentation time, which can lead to better flavor development.
Why didn’t my pizza dough rise?
If your dough didn’t rise, it could be due to expired or inactive yeast, or using water that was too hot or too cold. Make sure to always check the yeast’s freshness and use the correct water temperature.
Can I use whole wheat flour instead of all-purpose flour?
Yes, but keep in mind that whole wheat flour will result in a denser dough. You can substitute up to 50% of the all-purpose flour with whole wheat for a more nutritious option.
6. Substitutes
Here are a few substitutes you can use if you don’t have all the ingredients for your recipe for pizza dough with active dry yeast:
- Flour: If you don’t have all-purpose flour, you can substitute with bread flour for a chewier crust or whole wheat flour for a denser, more nutritious option.
- Olive Oil: You can use vegetable oil or melted butter in place of olive oil if necessary.
- Sugar: The sugar can be replaced with honey or agave syrup, though this may slightly change the flavor.
7. Nutrition Information
Here’s a basic breakdown of the nutritional content for one 12-inch pizza dough using this recipe (without toppings):
- Calories: 150 per slice (based on 8 slices)
- Carbohydrates: 28g
- Protein: 4g
- Fat: 3g
- Sodium: 210mg
- Fiber: 1g
Keep in mind that the actual nutrition will vary depending on the toppings and type of flour you use.
In conclusion, making pizza dough with active dry yeast is a rewarding process that yields delicious, homemade results. With just a few simple ingredients and some time for the dough to rise, you can create a pizza crust that’s crispy on the outside and soft on the inside. By following the steps outlined in this guide, you’ll gain confidence in working with yeast and handling dough. Whether you top your pizza with classic margherita or something more adventurous, the real star of the show is the freshly made dough. With practice, you’ll be able to adjust the recipe to suit your preferences, and before you know it, making pizza from scratch will become a regular and enjoyable part of your cooking routine. So, roll up your sleeves, and get ready to impress yourself and others with a homemade pizza that’s sure to be a hit!


